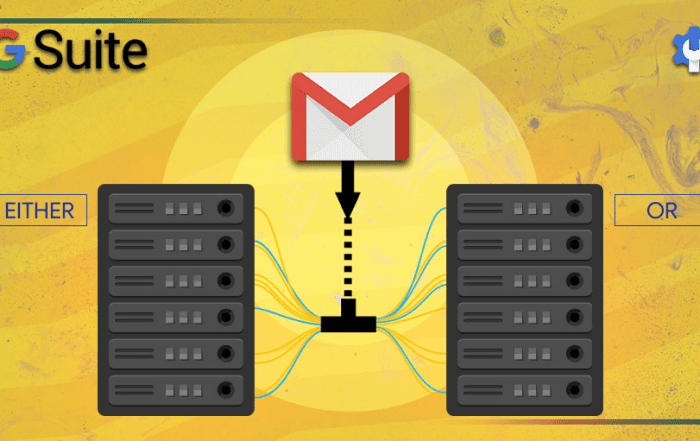
Google Workspace gives admins 2 main routing settings for managing email delivery: Default routing and Routing. Use Default routing to set up the default mail delivery for your organization. For example, if you want to send all or most of your organization’s email to multiple inboxes, use Default routing to up dual delivery for your entire organization. Then, use the Routing setting to create more specialized email delivery rules, or to override the Default routing behavior.
Default routing is a feature in Google Workspace that allows you to route incoming emails to specific destinations based on criteria such as the recipient, the sender, or the message content. Setting up default routing for your organization can help you manage your email flow more efficiently.
In addition, you can use Default routing to route all or most of your organization’s email to specific inboxes. This can help you streamline your email flow and improve productivity.
Default routing is easy to set up and can be configured using the Google Workspace Admin console. By leveraging this feature, administrators can ensure that their organization’s email is routed correctly and efficiently.
Here’s how to set up default routing in Google Workspace:
- Open the Google Workspace Admin Console with the administrator username and password.
- Click on “Apps” and then select “Google Workspace.”
- Click on “Gmail” and then select “Default Routing.”
- Click on “Configure” to create a new routing rule.
- In the Add setting box, take these steps:
Specify envelope recipients to match with the below listed options:
Single recipient—Specify a single user by entering an email address
Pattern match—Enter a regular expression to specify a set of recipients in your domain.
Group membership—Select from one or more groups in the list. Create your groups from the Groups tab. This option affects both direct and child group members
All recipients—Specify all recipients in your domain. This option only affects unrecognized addresses. Suspended users, users with Gmail turned off, and users who don’t exist are treated as unrecognized addresses.
If the envelope recipient matches the above, do the following:
- Modify message—Change affected messages. Specify messages are changed with the Modify message options, below.
- When Modify message is selected for affected messages, select options to specify how messages are modified:
Add X-Gm-Original-To header —Add a header tag if the recipient is changed, so the receiving server knows the original envelope recipient.
Add X-Gm-Spam and X-GM-Phishy headers —Add headers that indicate message spam and phishing status. Administrators for receiving servers use this information to set up rules for managing spam. For details, go to Add spam headers setting to all default routing rules.
Add custom headers —Add custom headers to messages affected by this setting. For example, you can add a header that matches the description you entered for the setting. Custom headers can help you troubleshoot routing settings and message delivery.
Prepend custom subject —Add custom text to the beginning of the subject line for specified messages. For example, enter Confidential for sensitive messages. If this setting is applied to a message with the subject Monthly report, the subject line is changed to: [Confidential] Monthly report.
Change the route —Change the message destination from the default Gmail server to a different mail server. Before you can change the route, you must add the server by following the steps in Add mail servers for Gmail email routing.
Change envelope recipient —The message bypasses the original recipient’s mailbox and goes to the new recipient. Change the envelope recipient in one of these ways:
Replace the recipient’s entire email address —After Replace recipient, enter the full email address.
Replace username —Change just the username of the recipient’s email address and keep the domain the same, before @existing-domain. Enter the username only, without the @ or the domain name.
Replace domain —To change just the domain of the recipient’s email address and keep the username the same, after existing-username@, enter the domain.
Bypass the spam filter for this message —Deliver incoming messages to recipients even if the spam filter identifies them as spam. This option applies only to incoming messages. You can’t bypass spam filters for outgoing messages. Note: This option is not available for the Groups account type. For details, go to Account types to affect.
Remove attachments from messages —Remove attachments from affected messages. You can also add text to let recipients know that attachments were removed.
Add more recipients —Deliver affected messages to more recipients. To enter recipient addresses, click Add. In the Add setting box, select Advanced for these options:
- Change route
- Change envelope recipient
- Do not deliver spam to this recipient
- Suppress bounces from this recipient
- Add X-Gm-Original-To header
- Add X-Gm-Spam and X-Gm-Phishy headers
- Add custom header
- Prepend custom subject
- Remove attachments from message
- Reject message —Reject the message before it’s delivered to the recipient. You can add a message to notify the sender about why the message was rejected. With this option, no other routing or compliance rules are applied to affected messages. Routing settings with the Reject message option are always the highest priority routing settings. Learn more in Order your default routing settings. When messages are rejected, Gmail automatically adds an SMTP rejection code, for example 550 5.7.1. This is an SMTP standard requirement, and the codes can’t be removed.
Envelope filter:
Select one or both of these options:
- Only affect specific envelope senders—Select this option, then enter the email addresses for the senders that you want to apply the setting to.
- Only affect specific envelope recipients—Select this option, then enter the email addresses for the recipients that you want to apply the setting to.
Enter the affected users for your selected options:
- Single email address—Enter the complete email address for a user.
- Pattern match—Enter a regular expression to specify a set of senders or recipients in your domain.
- Group membership—Select one or more groups in the list. For envelope senders, this option only applies to sent mail. For envelope recipients, it only applies to received mail. This option affects group members, and members of child groups.
Options:
Select an option to specify which email addresses the setting affects: Only unrecognized addresses, or both recognized and unrecognized addresses.
Unrecognized addresses are email addresses for suspended users and users with Gmail turned off.
Get help from a Google Workspace partner:
If you’re still having issues after trying the previous steps, you may want to consider getting help from a Google Workspace partner. A Google Workspace partner can provide you with expert advice and assistance in resolving any kind of issue.
Codelattice is a leading Google Workspace partner in Calicut, Mumbai, and Bangalore. As an authorised Google Workspace partner, we offer the best support for Google Workspace users, including help with technical issues.
To benefit from the best discounts and promo codes on Google Workspace pricing plans, reach out to Codelattice at gws@codelattice.com or call +91 9620615727. With over 15,000 satisfied users of Google Workspace, Codelattice is dedicated to delivering exceptional services and support.
Additionally, Codelattice provides free 24×7 technical support with an impressive average SLA (Service Level Agreement) of just 30 minutes. Rest assured, their team of experts will assist you in maximizing the potential of Google Workspace, enabling your organization to thrive in a collaborative and efficient work environment.
Don’t hesitate to partner with Codelattice, the trusted Google Workspace partner, and unlock the full potential of Google Workspace for your organization’s success!


